Tuesday, July 6, 2010

Absentee blogger returns once more!

I suck at this - apologies once more to anyone who follows this blog (anyone?) and has found nothing new on it for a while. Here's the latest from the world of Hummingbird baking.


Recipe: Coffee cake
Most challenging moment: none
Lessons learnt: Coffee cake is so very delicious!
----------------------------------------------------------------------------------------
After trying out stuff from the cupcakes and bars sections, I decided to try my hand at one of the Hummingbird cakes. The simplest one seemed to be this coffee cake. At this point, it's important for me to give you an aside about my relationship with coffee. Growing up I hated it... the smell, the taste... it just made me want to hurl. Then about three years ago, I started by drinking a cup every week, then two cups a week and now my morning doesn't begin without a good, strong coffee (with one brown sugar and skim milk, thank you!)

So this seemed like a good time to try a coffee cake. The recipe was very straightforward. It involved making a coffee essence by boiling a few tablespoons of water with two teaspoons of strong instant coffee. Once the essence had cooled, it was poured into a very standard cake mix of butter, sugar, eggs, flour and baking powder. I decided to double the recipe because I wanted two cakes (one for a friend who had just completed six years at work; and the other for a dinner party we were planning that week). I used my brand new blue, shaped silicone pan and the results were oh so beautiful.

I used my own icing because I don't like the Hummingbird icings at all - they use too much sugar. I made a standard chocolate icing with melted bittersweet chocolate, butter, sugar and milk and mixed in some more coffee essence. The first icing was too thick so the cake didn't look so great... although I improved the appearance slightly by adding chocolate shavings... however everyone at work thought was delicious.


For the second cake, I decided to add more milk to the icing to make it more runny and that turned out great. It was served with vanilla and coffee ice cream and the guests (a family that doesn't always enjoy a 'western' dessert recipe) asked for seconds - woo hoo! Converted by Hummingbird!


So that was the success...


Wednesday, April 28, 2010

After a looong absence!

Recipe: Double chocolate cookies
Most challenging moment: The first batch of cookies spreading all over the cookie sheet
Lessons learnt: To trust my instincts - read on to find out what I mean.
-------------------------------
I never realised how difficult it is to combine baking and blogging! How do people do it so frequently? I am truly impressed!! I have been baking but I have totally neglected blogging about it - as is obvious from the lack of posts on this blog. In fact the only reason I have forced myself into doing this post is because three people (of the five who follow this blog very kindly) noticed my long absence. This is not good and I will try harder to be committed to blogging.

I have tried three or four recipes from the book in the last few weeks. The first of these - double chocolate cookies - is what I am going to write about today.

Indulge me for a few minutes while I tell you that I adore chocolate chips cookies. The standard recipe I have used for many years comes off the back of the Hershey's choc chip package and is frankly, too amazing for words. The most important aspect of a chocolate chip cookie is 'chewiness' - is that actually a word? Choc chips cookies have to be baked for 8-10 minutes max so that they are soft in the centre and very very slightly firm around the edges. If you bake them for too long, they will become crispy, and crispiness is a VERY undesirable trait in a choc chip cookie. That's probably one of the reasons I cannot stand those terribly crispy disks of cocoa and substandard chips that pass off for chocolate chip cookies in Pakistan.

When making a choc chip cookie, it it really important to have good chocolate chips. The choices are limited in Pakistan but whatever you do, do not buy a the generic ones. The will either lose their shape while baking and melt, or they will just taste awful. I always use Hershey's; these are obviously not top of the line but it's the best that's available. They are on the pricey side - 295 rupees for a 340 gram bag - but they are certainly worth it. I try to have two bags of the semi-sweet variety (you can also buy Hershey's milk chocolate chips but they are a lot sweeter) in the fridge at all times. Once you start using them you realise that they are incredibly versatile and there is no end to what you can do with them. But in case I ever run out of ideas, I have chocolate chip cookbook that I can refer to. (If you want a peak inside the book, check it out here - if you want to buy it, it's available at Liberty Books.

Coming back to the recipe though, I decided to try the double choc chip cookies because a) they looked terribly decadent; b) I had a friend who was feeling a bit down and really needed a serious dose of decadence; and c) they looked very easy to make!

Keeping those three very good reasons in mind, I took 200 grams of melted chocolate (I weighed out and melted the semi-sweet choc chips) and mixed it together with butter, flour, vanilla essence, baking powder and eggs. Then I added a further 100 grams of semi sweet choc chips in solid form. While I was doing all this it occurred to me that the recipe had a great deal of liquid content and not enough flour. This continued to bother me throughout the process but I decided to ignore it thinking that the low flour content just meant that this was going to be a super chewy cookie.

When I put the first batch of cookies on the cookie sheet, I could only fit in four because they spread out all over the pan and looked dangerously close to merging together to form one giant cookie. I decided to bake these as is and even though they came out of the oven as four cookies (surprise, surprise), they were hideously out of shape and I had to scrape them off the sheet.

What a wonderful thing it is that cookies are baked in batches! So I simply added another half cup of flour to the batter and tried again and this time they turned out perfectly. And while I was disappointed that the recipe was not written correctly, I was glad that I was able to salvage it and make two dozen very decent sized cookies from the batter.

This is not a great picture of these cookies because my resident photographer (my brother) was not available but it is the best I could do. But they were soft, they were chewy and they were oh so fudgey... just thinking about them makes me want more.

I gave a dozen of these cookies to my friend, MA, who loved them so much, he has been asking me to bake more for him ever since. As for the other dozen... well they sort of disappeared at home :)

Thursday, March 18, 2010

The Scale!

I enjoy reading food blogs and one of them had what I thought was the perfect post on the importance of the weighing scale.

Good equipment really is indispensable!

http://www.delish.com/food/dessert-blog/the-bakers-toolbox-kitchen-scale

Tuesday, March 16, 2010

Indispensable baking equipment - Part 1

I admit it, I was lazy this weekend and therefore decided to steer clear of the kitchen. This basically means that I did not bake either of the cupcake recipes I so proudly mentioned in my last post.

The trouble with baking is not the baking but the washing up afterwards, and this Sunday I was in no mood for washing up. So after I got back from church, I took a short nap (must compensate for waking up at 7:30 a.m. every Sunday), ate a lovely lunch and then settled down to finish my book - The Lost City of Z - great book and a must read for all who are interested in exploration and adventure. (Rumour has it that Arthur Conan Doyle based The Lost World at least partially on the adventures of Col. Percy Fawcett - protagonist of Lost City of Z)

Anyhoo, moving on though, I thought I'd intersperse my baking experiments with notes about equipment and if anything is indispensable in the quest for baking greatness, its measuring equipment. How can you bake without measuring cups, spoons and the like?

Of course there are exceptions to this rule - my late maternal grandma being one of them. Back in the 50s when she had no oven (let alone a weighing scale) and very little disposable income, she ensured that all four of her daughters and my grandpa had a beautifully turned out cake each birthday, and also invented some really fabulous recipes on her own which have been passed on to me - no one can beat her carrot cake and bread pudding!

I am not such an expert however and I do love my creature comforts in the kitchen. I can't resist buying shiny new implements and tools - they are necessities after all, are they not!

                                Baker's essentials 

I use my weighing scale religiously when I bake - I find that it is actually far more accurate to weigh flour and sugar in terms of grams than it is to do so by cup. I use this digital one although I do have an old fashioned one as well. I find it really exciting to put a bowl on the scale, press a button, put in the ingredient and then watch the scale work its magic. (Putting the bowl on the scale before switching it on allows the scale to make an adjustment for the weight of the bowl.) Digi scale makes me feel most high tech :)

I know a lot of people use a regular tea cup to measure stuff out but nothing beats a set of the real thing - they are a total investment, as is the spoon set. And the liquid measure, who can do without one. I actually have two of these, the one in the picture is the smaller of the two and is good for measuring in ml. The other is larger and works better for large scale projects that require litre measures.

If you're interested in baking and can't figure out why things go wrong, I strongly suggest investing in the best quality measuring equipment, you'll never be sorry about it!

Friday, March 12, 2010

A touch of pink and some music!

Just in case you're logging on after a few days and are surprised by the change of appearance... I thought I'd write a quick note.

I'm your typical girl in that I love the colour pink... plus it is sooo sooo... well it just reminds me of frosting and swirls and pastries and cakes. Anyway, hope you enjoy the pink blog. Also if you put your headphones on you can listen to some great music while you read my blog because great food and music go together, right!

I'm hoping to attempt another recipe from the cookbook this weekend. It's a contest between 'peaches and cream cupcakes' or 'coconut and pineapple cupcakes'. Let's see which one wins; for the time being have a lovely weekend :)

Wednesday, March 10, 2010

Getting tangy

Recipe: Lemon bars
Most challenging moment: Zesting lemons
Lessons learnt: Extracting lemon zest is hard work but well worth the effort
---------------------------------------------------------------------------
Mrs. J, a reader of my blog, said via email last week that I must put up the recipes of the things I cook in order for the tips to be useful. When I started this blog, I did consider this but deliberately decided against doing so because I didn't want this to become a 'recipe blog'. However after due consideration to Mrs J's suggestion I have decided to slightly update the format of my posts and hopefully this will provide an improved point of reference for my readers. (Please do write in and let me know what you think, Mrs. J)

So, lemon bars - I once tried to make them a LONG time ago (probably over 10 years ago now) with very, very sad results. That incident is best not revisited at present, but when I saw this recipe in the Hummingbird cookbook, my heart lurched with fear... could I tackle my old nemesis? 


I started by taking a picture of what the bars looked like in the cookbook. 


Then I got down to business. The most crucial task in the entire recipe was to procure 5 tsps of lemon zest. I started with 5-6 lemons and a hand grater and assumed it would take a few minutes... ummm, not so! It took an hour, 17 lemons and one slightly zested finger - when it was all done, I was quite ready to break out into the Hallelujah chorus.


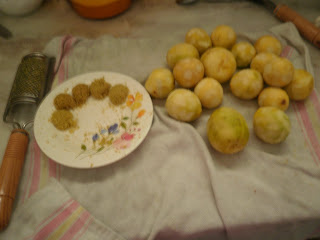
With the zesting complete, I moved on to making the crust, which was simple enough. It involved butter, sugar, flour and half the lemon zest. I whizzed it all up in my mixer and miraculously found exactly the right sized pan to put it in - 22cm by 33 cm (just as the book suggested). I also used a fork to make pock marks in the crust before baking it for 20 minutes. This stops the creation of air bubbles in the crust.


Next I made the filling with the leftover zest, some eggs, 100 ml of lemon juice and some sugar, and poured it over the crust. The whole thing went into the over again for 40 minutes, was cooled and refrigerated and finally came out looking rather wonderful :)

My family loved them so much, we cut them up into smaller squares and gobbled up quite a few. If I had to make these again, I would change... nothing! The recipe was perfect, the bars were lovely but next time I will consider paying someone to zest the lemons for me!!

Friday, March 5, 2010

Hummingbird takes off

Recipe: Banana and chocolate cupcakes
Most challenging moment: Trying to apply frosting with a palette knife (it is surprisingly difficult)
Lessons learnt: A cup of flour weighs more than a cup of sugar; ALWAYS use cupcake papers!
-------------------------------------------------------------------
I love bananas, the great thing is they're available all year round, and yet they are so undermined. Anyway I thought I'd kick things off with a banana recipe - Banana chocolate cupcakes (since Hummingbird is most famous for its cupcakes, it made sense to start with that).

In my experience, there aren't too many desserts that combine bananas and chocolate, which is sort of odd because the flavours work really well together. I tried this combo for the first time at a youth group barbecue when I was 16. These Aussie friends of mine barbecued the bananas and then buried them in Hershey's chocolate sauce. Pure heaven - and when you're 16, the calories, they don't mean a thing!

In any case, as cupcake recipes go, this one was incredibly simple. I had the batter for the banana cupcakes ready within 15 minutes...

Baker's dozen - ready for the oven :)

The cupcakes came out of the oven looking fantastic - soft, moist and utterly... well... edible! Some twisted logic compelled me to bake them without cupcake cases (even though I have 1000 cases in stock!!) and this proved to be problematic because, unlike other types of cupcakes, the banana are soft and stick to the pan even after they have cooled. But I did manage to take them out of the pan without utterly mutilating them. 


The chocolate frosting was tricky - it called for 300 grams of icing sugar (that's about 3 cups!), which I thought was rather a lot. Still I wanted to stay true to the recipe so I followed it precisely. I think it was a mistake because it was an incredibly (read sickeningly) sweet frosting. Additionally there was no chocolate in it, only cocoa - and while I do appreciate that a lot of recipes use cocoa, I am a purist. Good choc frosting MUST have good quality, slightly bittersweet chocolate. 


I used a palette knife to layer on the frosting (as the book suggested). This was also a mistake because i'm not really an expert at doing this kind of thing and my cupcakes fare a lot better (and look a lot prettier) when I use a piping bag.
On the whole though, the cupcakes were great and the frosting was average. Combined, they were pretty good but not as good as they could have been had I used my own frosting recipe. That didn't really make a difference however because most of them were polished off by my mum and brother and I gave some to a sweet old lady from church who really appreciated them.


Here they are in pictures - Banana Chocolate Cupcakes
Photos by Stephan Andrew 
Styling by yours truly